.webp)


Most interior photos have the same problem. The room looks good but the windows blow out to white. Or you expose for the windows and the walls go dark. Neither version looks like the property.
HDR photography solves this by combining multiple exposures into a single image that holds detail across the full dynamic range of the scene. It is the default technique for professional real estate photographers in North America and Europe, and when done right, the results look completely natural. When done wrong, they look like a video game.
This guide covers the full HDR workflow: camera settings, bracketing, window pulls, post-processing, and what to do with those images once the editing is done. If you want to add listing videos to your photo packages without any filming, see how Amplifiles works for photographers.
What Is HDR Photography in Real Estate?
HDR stands for High Dynamic Range. In real estate, it means capturing the same scene at multiple exposures and blending them in post-processing to produce one image that holds detail in both the dark corners and the bright windows.
A standard camera sensor captures roughly 10 to 14 stops of dynamic range. The human eye adapts in real time and perceives closer to 20. That gap is what makes unprocessed interior shots look flat or blown out. HDR bridges it.
The technique works best for interior spaces where ambient light varies significantly across the frame. A living room with large south-facing windows is the typical case. Shoot it at one exposure and something gets sacrificed. Shoot it at five and the post-processing software has enough data to reconstruct the full scene.
Listings with HDR photos also sell 50% faster on average and attract 118% more online views than standard images. Those numbers reflect both image quality and buyer psychology: a well-lit, detail-rich photo signals a well-maintained home.
This is part of why photography quality has such a direct impact on listing performance. The real estate photography tips guide covers what separates high-performing listing photos from average ones, including composition, lighting, and delivery standards.
HDR vs. Flash vs. Flambient: Which Should You Use?
Real estate photographers work with three main lighting approaches. Each has a distinct tradeoff between speed and quality.
Ambient HDR means shooting bracketed exposures using only the available light in the room. No flash required. This is the fastest method on-site, which is why it dominates residential real estate photography. An experienced photographer can move through a property efficiently, capturing five exposures per shot without setting up or adjusting any lighting equipment.
Flash photography means adding an off-camera strobe to overpower or supplement ambient light. Flash gives better color accuracy because it eliminates the mixed color temperatures (warm tungsten, cool daylight, greenish fluorescent) that ambient HDR has to manage. The tradeoff is time. You set up for each shot, position the light, and test as you go. Most photographers reserve this for luxury listings where quality justifies the extra hours on-site.
Flambient blends both approaches. You shoot an ambient bracket for HDR, then shoot a single flash frame, and blend them in post. The flash frame handles color accuracy and fills shadows; the ambient frames handle dynamic range. It is more work than pure HDR but significantly less effort than full flash photography, and the results are usually cleaner than ambient alone.
For most residential listings, ambient HDR is the right call. It is fast, reliable, and produces images that look professional and natural. The agents who hire you want rooms that look bright and inviting on a phone screen, and ambient HDR delivers that consistently.
Camera Settings for HDR Brackets
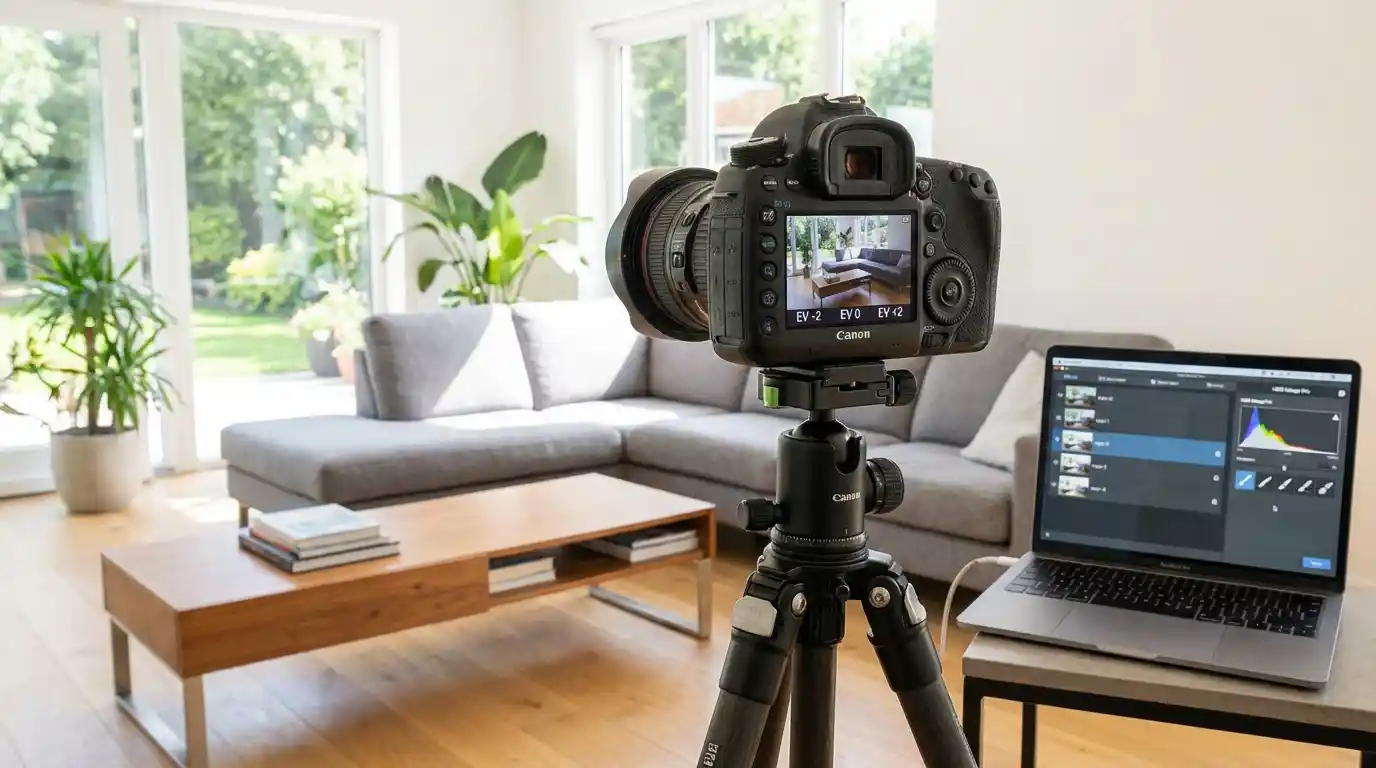
HDR requires a tripod. No exceptions. You are stacking exposures taken at different shutter speeds, and any movement between shots creates ghosting artifacts that are very hard to remove in post-processing.
Use AEB (Auto Exposure Bracketing), which most DSLRs and mirrorless cameras support natively. Set it to capture five brackets at plus or minus 2 EV intervals, giving you shots at -4, -2, 0, +2, and +4 EV relative to your base exposure. Five shots at two stops covers the full range you need for most residential interiors.
Keep ISO at 100. You are on a tripod, so there is no reason to introduce noise. If the room is very dark and you cannot get a workable base exposure at ISO 100, open up the aperture rather than raising ISO.
Set aperture between f/7.1 and f/11. This range gives enough depth of field to keep every surface sharp without diffraction softening. f/8 is a reliable default for most rooms.
Shoot in RAW. HDR blending software needs full sensor data to work properly. JPEGs have already been compressed and processed, which reduces the dynamic range available for blending.
Use a remote shutter release or set a 2-second self-timer to eliminate camera shake from pressing the shutter button. This matters at the slow shutter speeds common in real estate interiors.
If you are building out your kit, the real estate photography equipment guide covers camera bodies, lenses, tripods, and lighting gear at every price point.
The Window Pull: How to Handle Bright Windows
The window pull is the most important technique in HDR real estate photography. The name refers to exposing specifically for the exterior view visible through a window and blending that frame into your composite so the outdoor scene looks correctly exposed.
Why it matters: standard HDR blending handles interior dynamic range well, but exterior views through windows often remain overexposed even after tone mapping. The sky turns white. The garden disappears. A properly executed window pull fixes this.
In your bracket set, identify the darkest exposure, which is the one underexposed by 2 or 4 stops relative to the base. That frame will show the exterior view at close to correct exposure. In post-processing, you mask that frame's window region into your final composite. This can be done manually in Photoshop using luminosity masks, or automatically by tools like Photomatix Pro or Lightroom's HDR merge function.
For rooms where the window pull is critical, such as south-facing windows in midday sun, some photographers add a dedicated window frame. They point the camera at the exterior through the window and expose specifically for the outdoor scene. This separate exposure gives more control than relying on the darkest bracket alone.
Window pulls are where the HDR versus flash debate is most relevant. A flash frame can make the window pull cleaner because it brightens the interior to more closely match the exterior exposure, reducing the contrast ratio the software has to manage. If your ambient-only window pulls look washed out, adding a single flash frame may solve it without changing the rest of your workflow.
Post-Processing: Lightroom, Photomatix, and Luminar Neo
The three most widely used tools for HDR blending in real estate photography are Adobe Lightroom Classic, Photomatix Pro, and Luminar Neo.
Lightroom Classic handles HDR natively through Photo Merge then HDR. Select your brackets, merge to a DNG file, and edit the result like any raw file. Lightroom's merge produces clean, natural results and keeps everything in one application. Its limitation is that auto-alignment and deghosting are less powerful than Photomatix, which matters when you have moving curtains or plants in frame.
Photomatix Pro is purpose-built for HDR and gives more control over tone mapping and blending modes. Batch processing is straightforward when you are editing 40 to 60 images from a single property. Photomatix requires more judgment to avoid the over-processed look but rewards photographers who take time to dial in their presets.
Luminar Neo with the HDR Merge plugin uses AI to understand the scene and prioritize natural results. In 2026, it is one of the faster options for photographers who want clean output without spending time on manual adjustments. The AI realism mode specifically helps with window pulls and avoiding the saturated look that gave HDR a bad reputation in the early 2010s.
The goal across all three tools is the same: an image that looks like a well-lit, accurately-exposed photograph of the property, not an obviously composited HDR image. Buyers do not know what HDR is. They should not be able to see the technique.
How to Avoid the Over-Processed Look
Over-processed HDR has a specific signature: excessive local contrast, halos around windows and lamps, colors more vivid than any room can actually look, and shadows that are simultaneously too light and too dark. This style was common in 2010. It looks unprofessional today, and clients notice even if they cannot name the problem.
Avoiding it is mostly about restraint in post-processing.
- Start from a natural or photorealistic preset, not a dramatic one. Most HDR software ships with both. Always start natural and adjust from there.
- Watch the highlights around light sources. Interior lamps and ceiling fixtures are the most common source of halos. Reduce highlight and white recovery around these areas specifically, not globally.
- Do your color work in Lightroom after the HDR merge, not inside the HDR software. You have more precise control over individual color channels in Lightroom, and the results are more predictable.
- Pull the shadows back. HDR software lifts shadows aggressively. If you can see detail in an area where a real eye would see darkness, reduce the shadows until it looks like a real room.
- Export and view at 25% zoom before delivery. Many HDR artifacts are invisible at 100% crop but obvious at thumbnail scale, which is exactly how buyers see listing photos.
From HDR Photos to Listing Videos
Most real estate photographers deliver processed HDR images to agents as their final product. A growing number are adding listing videos as an upsell, and the same HDR images that go into the MLS listing are exactly what you need to create one.
Amplifiles is an AI-powered real estate video maker that turns listing photos into branded marketing videos. It is designed for real estate agents and photographers who need professional-quality videos without editing skills. Photographers upload their processed HDR images and receive a 1080p marketing video with voice-over, music, and captions in approximately 5 minutes. The price is $1.50 per image, and new accounts start with 1,200 free credits.
Unlike Animoto or InVideo, which are general-purpose video tools that require manual timeline editing, Amplifiles is purpose-built for real estate listing photos. It handles property sequencing and photo-to-video formatting automatically and produces branded output that agents can post to social media, YouTube, or their listing pages the same day as your photo delivery.
Adding listing videos to your package gives agents a complete marketing asset from a single shoot. They get HDR photos for the MLS and a listing video for social and email, with no separate videographer needed.
Photographers working with Amplifiles typically offer listing video as an add-on priced at $50 to $100 above the standard photography package. Since Amplifiles handles all production, the margin on that add-on is close to full. See how other photographers are structuring their packages in the real estate photography pricing guide.
Frequently Asked Questions
Is HDR good for all real estate photos?
HDR works best for interior spaces with high dynamic range, typically rooms with windows where the contrast between indoor and outdoor light creates exposure problems. Exterior shots in even lighting, twilight photos, and drone images generally do not need HDR processing. For a standard residential shoot, most interior shots benefit from HDR and most exterior shots do not.
How many exposures do I need for real estate HDR?
Five exposures at plus or minus 2 EV is the standard for most residential interiors. This gives you a range from -4 EV (useful for window pulls) to +4 EV (captures shadow detail). Some photographers use nine exposures at plus or minus 1 EV for smoother blending in rooms with extremely difficult lighting. Three exposures can work in moderate situations but gives the software less data to blend from.
What is the difference between HDR and flambient?
HDR uses only ambient light captured at multiple exposures and blended in software. Flambient blends an ambient bracket with one or more flash frames. Flambient typically produces better color accuracy and cleaner window pulls because the flash reduces mixed color temperatures and lowers the interior-to-exterior contrast ratio. The tradeoff is additional time on-site and more complex post-processing.
Can I create a listing video from HDR photos?
Yes. HDR photos are exactly the right input for AI listing video tools. Amplifiles accepts standard JPEGs exported from your HDR workflow and converts them into 1080p marketing videos with voice-over, music, and captions in about 5 minutes. Many photographers offer listing video as an add-on to their standard photo package using this workflow, with no additional filming or video editing required.
What HDR software do professional real estate photographers use?
The most commonly used HDR tools in real estate photography are Adobe Lightroom Classic (native HDR merge), Photomatix Pro, and Luminar Neo with the HDR Merge plugin. Lightroom is the most integrated option for photographers already working in that ecosystem. Photomatix offers more tone mapping control and strong batch processing. Luminar Neo uses AI-based processing that tends to produce natural results with less manual adjustment needed.
Final Thoughts
HDR is the foundation of professional real estate photography. Get the bracketing right on-site and you give yourself the raw material to produce images that hold detail from corner to corner, window to wall. The editing is where most photographers develop their signature look, but the work starts with a solid tripod, a calibrated AEB setup, and the discipline to shoot every room the same way.
We built Amplifiles because real estate photographers deserve a complete workflow, not just better photos. Our platform turns listing photos into professional 1080p marketing videos in about 5 minutes, with voice-overs, captions, and branding. No filming or editing required.
Browse real estate video examples to see what a delivered listing video looks like before creating one. Or jump straight to how Amplifiles works for photographers and start with your 1,200 free credits.